")
")
VeraCrypt is a free open source disk encryption software for Windows, Mac OSX and Linux. You can download it here.
ENCRYPTING A DRIVE USING VERACRYPT
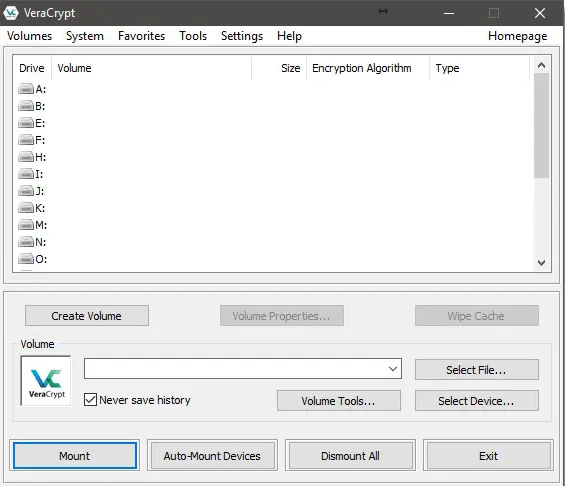
1) Click on the Create Volume button to begin.
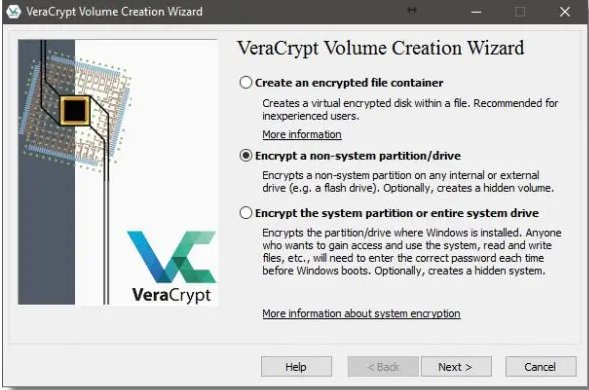
2) Since you are encrypting an external drive, make sure that “Encrypt a non-system partition/drive” is selected, and click on Next.
3) Select Standard VeraCrypt volume and click Next.

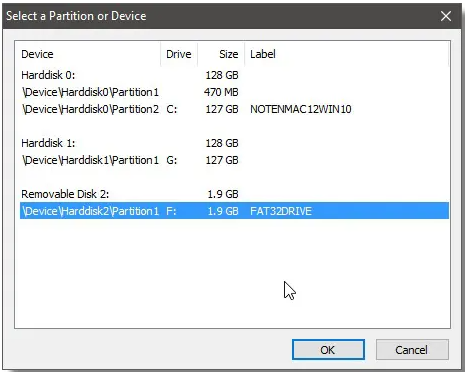
4) Click the Select Device… button on the following dialog (not shown). You can see that each hard disk on my machine is listed, including the external one. You'll click on your external drive, and click OK.
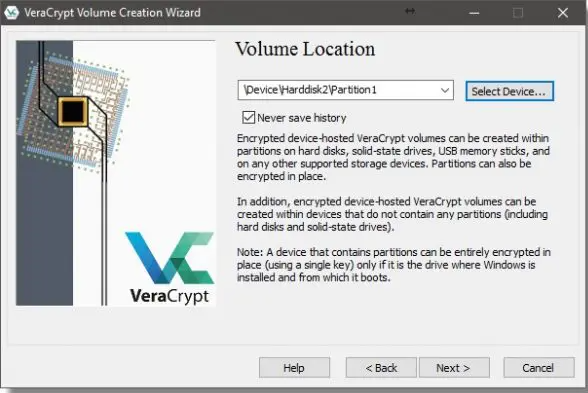
5) This returns us to the Volume Location dialog with the location filled in. Click Next.
6) When encrypting an external drive, VeraCrypt can operate one of two ways:
- It can erase the drive and encrypt the volume to contain your data. This is generally fastest, but erases all data currently on the drive or partition.
- It can encrypt the data in place. This takes more time, as every sector is read, encrypted, and written back out to the drive.
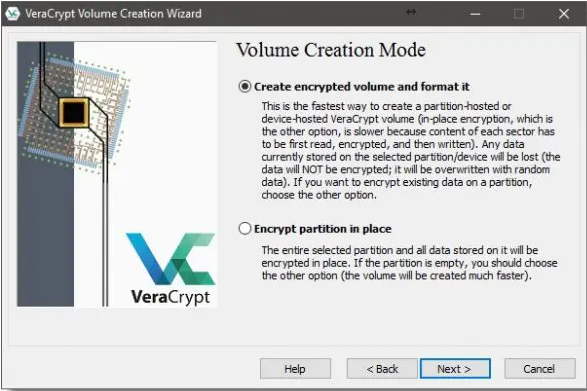
If your external drive is brand new or full of data you no longer need, you'll choose “Create encrypted volume and format it”. If you wish to retain your data, choose “Encrypt partition in place”. Click Next.
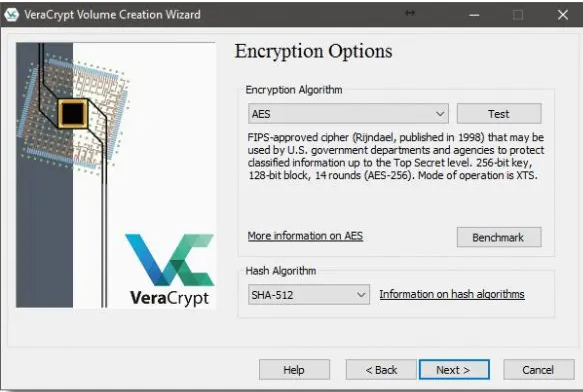
7) VeraCrypt actually supports a number of different encryption algorithms, and you can select among the variations here if you want. It’s typically best to accept the defaults and click Next.
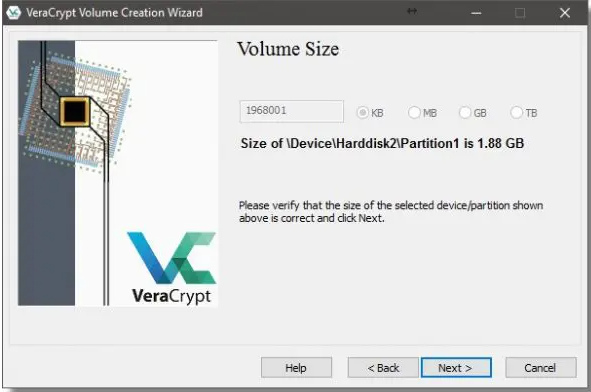
8) When encrypting an entire hard disk, the Volume Size dialog simply reports the size of the drive you’re operating on. Click Next.
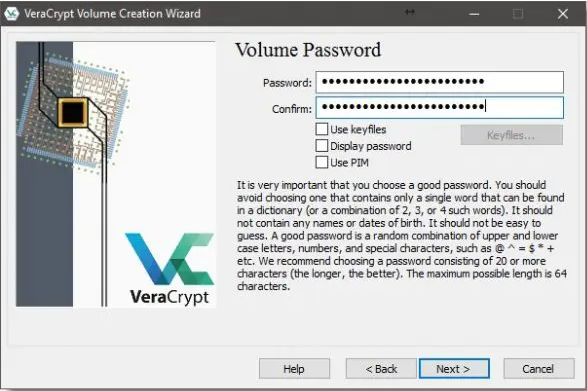
9) Password selection : the single most important aspect of this entire operation. VeraCrypt will allow you to see the password as you type it in, if you so choose (check the Display password box).
You can choose to type in a pass phrase – a longer multi-word phrase that is both memorable and relatively long.
Do not forget your password. A VeraCrypt volume cannot be accessed without the password. There are no back doors or recovery methods. If you lose your password to a VeraCrypt volume, you have lost the contents of that volume.
Click Next.
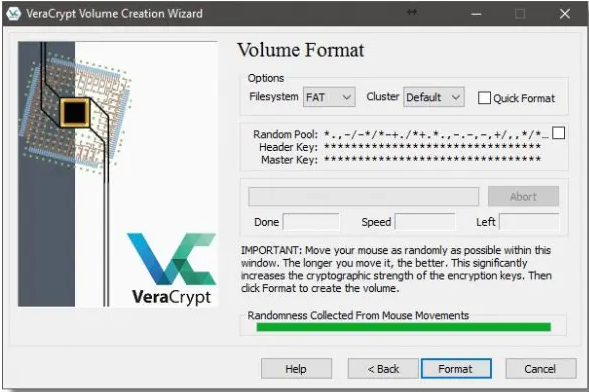
10) FUN PART : Random data is an important aspect of encryption.
"Move your mouse as randomly as possible within the window Volume Format" 
VeraCrypt will use your random mouse movements to generate random data. Make sure the “Randomness” bar has turned green before moving on. VeraCrypt makes a guess or two on your Filesystem choice. I tend to prefer NTFS as being slightly faster in many cases, and supporting more robust security. FAT, on the other hand, works just about everywhere.
If Quick Format is checked, the formatting process is performed quickly, writing only filesystem and directory information to the disk. The downside is that the contents of any sectors not written to could, potentially, still be recovered.
If Quick Format is not checked, then the formatting process will write to every sector on the disk, obliterating any pre-existing data. It'll also take longer : HOURS !!
Click on Format.
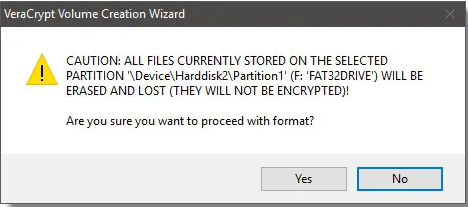
11) Depending on how much pre-existing data your target drive appears to have, you may get one or two warnings it’s about to be erased. Click Yes, and formatting will proceed.
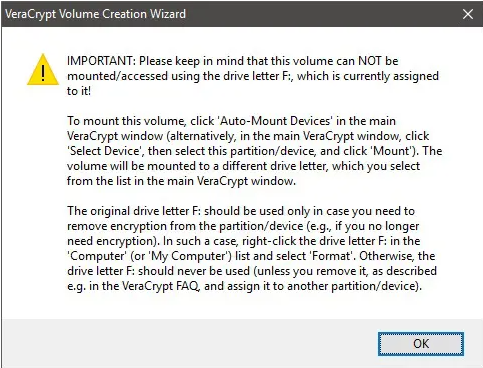
12) VeraCrypt will take a long time to encrypt a volume of any significant size. It doesn’t matter how much data is on the volume; all sectors, whether they’re used or not, are encrypted. When complete, VeraCrypt provides some additional instructions on how to mount your encrypted drive (see next section).
USING YOUR ENCRYPTED DRIVE
1) Connect your VeraCrypt encrypted drive, you may get this message:
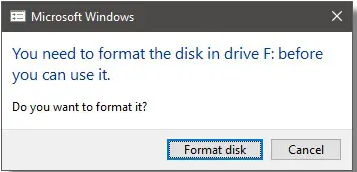
====>>>> THE ANSWER IS CANCEL.
Your drive is encrypted and has not been mounted. To Windows, your encrypted data looks like an unformatted (RAW) drive. If you were to format it, you would lose everything on the drive.
Click Cancel.
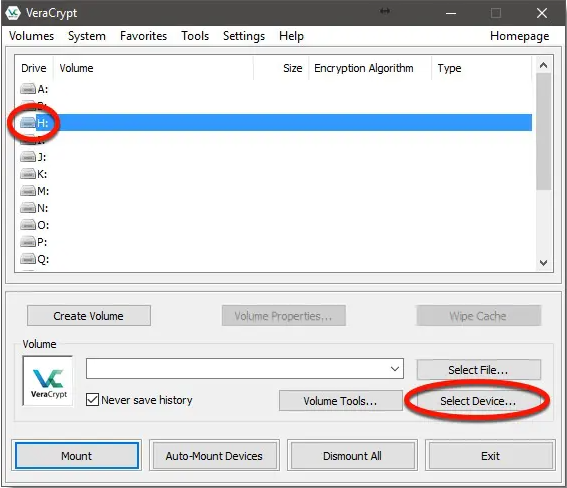
2) Open VeraCrypt and click the drive letter you want your encrypted volume to appear as, and then click Select Device….
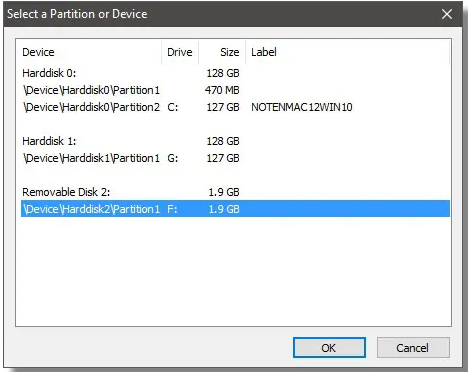
3) Click the drive letter or line that represents the encrypted drive, and click OK.
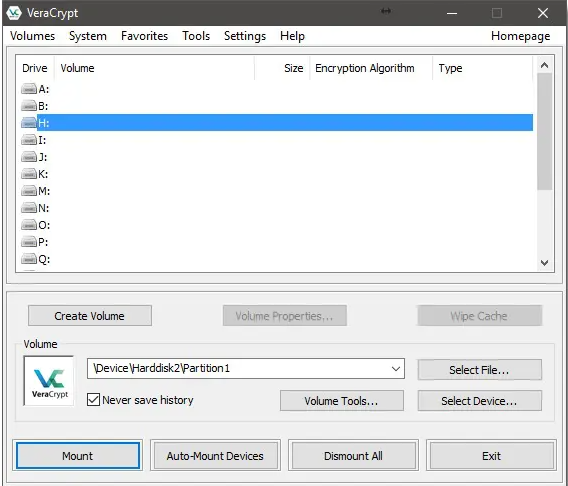
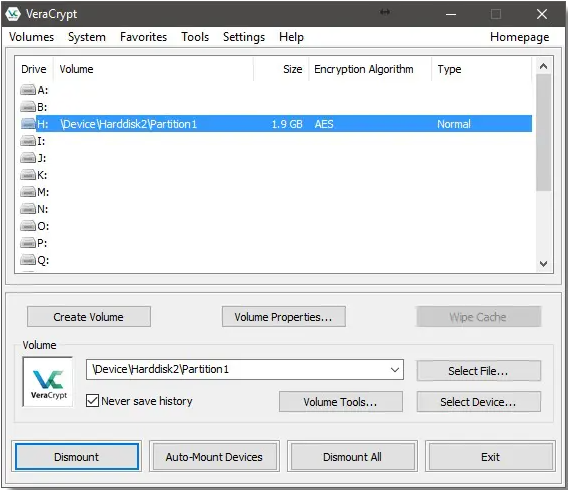
4) You can see the volume is filled in. Click Mount to mount the drive.
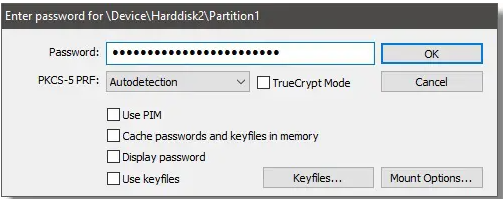
5) Enter the passphrase you used when you encrypted the drive, and click OK.
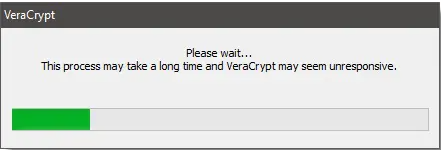
6) VeraCrypt takes a little time to mount the drive.
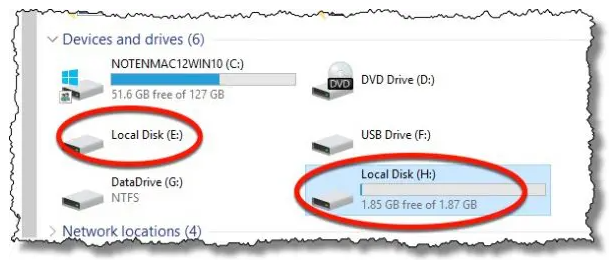
7) Contents of the encrypted volume are now available as drive, the drive letter at which the external drive originally appeared. VeraCrypt makes its encrypted contents available as the drive you select when mounted (in this example, the H: drive).
DISMOUNTING THE DRIVE
Naturally, when you power down your machine, the encrypted volume will be dismounted. When you next power up your machine, or attach your external drive, you'll need to mount the drive again in order to access its contents, providing the passphrase, of course.
If you want to remove the external drive without turning off your computer:
Close all programs currently accessing files on the encrypted volume. In VeraCrypt, click the mounted volume and then click Dismount. Finally, click the “Safely Remove Hardware” icon in the Windows Taskbar and click the device listed there.
Yes, it's a bit of work to set up, but once it's done, it’s relatively easy to use, with little to no impact on performance . More importantly, it’s secure. I can now lose my external hard drive without fear of anyone gaining access to its encrypted contents.